The fallen hero
We'll create a new hero.js file. We'll start with a really basic version to get started, and we'll make it better as we go through this chapter.
export default class Hero {

    constructor () {
        this.x      = 0
        this.y      = 2.5
        this.width  = 1
        this.height = 1
        this.sprite = 'hero1'
    }

}
Let's add it to the scene.
this.hero = new Hero()
We just need to display it now. We'll make a function called drawHero and use it in the drawScene function.
function drawHero (ctx, scene, images) {
    const hero = scene.hero

    const drawParams = {
        x:      hero.x - scene.camera.x,
        y:      hero.y - scene.camera.y,
        width:  hero.width,
        height: hero.height,
        image:  images[hero.sprite]
    }

    drawImage(ctx, drawParams)
}

export function drawScene (ctx, scene, images) {
    // ... omitted for brevity

    drawHero(ctx, scene, images)
}
You will notice that the hero disappears immediately. We need to tell the hero to follow the camera.
In the update function of the scene, after moving the camera, we can also reposition the hero. Let's also move the hero half a bit to the right so that it's not too close to the edge.
update (deltaTime) {
    this.camera.x += this.camera.speed * deltaTime
    this.hero.x = this.camera.x + 0.5
    this.generateWorld()
}
Animate the hero
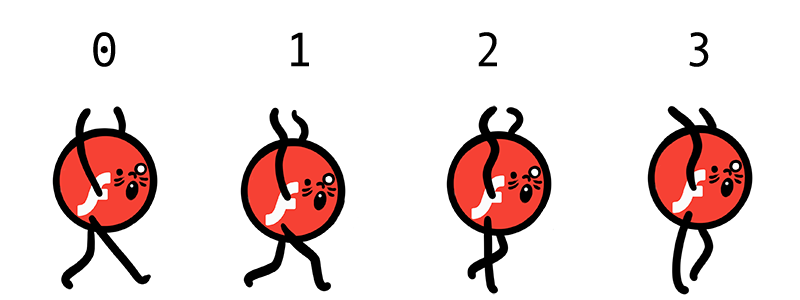
We have an animation ready for the hero, which has 4 sprites that will be played repeatedly.

To play this animation, we need these things:
- The order of the frames in a list
- The position of the current frame
- How much time has passed since the last frame
- The speed at which the frames should play
We'll start by adding this information to our hero.
constructor () {
    // ... omitted for brevity

    this.frames     = ['hero1', 'hero2', 'hero3', 'hero4']
    this.frameIndex = 0
    this.frameTime  = 0
    this.frameSpeed = 0.2
}
We'll make sprite a dynamic property that will get the current frame from the list of frames.
get sprite () {
    return this.frames[this.frameIndex]
}
Next, we'll create an update function that will update the animation based on the time. The animation speed will change with the camera speed.
update (deltaTime, camera) {
    this.x = camera.x + 0.5
    this.frameTime += deltaTime

    const nextFrameTime = this.frameSpeed / camera.speed

    if (this.frameTime > nextFrameTime) {
        this.frameTime = 0
        this.frameIndex = (this.frameIndex + 1) % this.frames.length
    }
}
We'll then use this function in the update function of the scene.
update (deltaTime) {
    this.camera.x += this.camera.speed * deltaTime
    this.hero.update(deltaTime, this.camera)
    this.generateWorld()
}
Now our hero will look like he's running!
Jumping
To make our hero jump, we'll add some new informations:
- We'll need to know the jump force and fall speed (which is also called gravity)
- We'll also need to know where the ground is
- Lastly, we'll need to keep track of the hero's current velocity, whether they're going up or down

constructor () {
    // ... omitted for brevity

    this.gravity   = 35
    this.jumpForce = -9
    this.velocityY = 0
    this.groundY   = 2.5
}
Now that we have this new information, we can create a jump function that will make the hero jump by applying an upward force if they're on the ground.
jump () {
    if (this.y === this.groundY) {
        this.velocityY = this.jumpForce
    }
}
In the hero's update function, we'll apply gravity and velocity to the hero. If the hero is on the ground, we'll set their velocity to 0 to stop them from falling through the ground.
update (deltaTime, camera) {
    // ... omitted for brevity

    this.y += this.velocityY * deltaTime
    this.velocityY += this.gravity * deltaTime

    if (this.y > this.groundY) {
        this.y = this.groundY
        this.velocityY = 0
    }
}
Catch the mouse
We're all set for jumping! The last thing we need to do is to listen for mouse clicks and call the hero's jump function.
To do this, we'll go back to the toy.js file and add an event listener to the canvas.
canvas.addEventListener('pointerdown', () => {
    scene.hero.jump()
})
Go ahead! Try to jump!
A hero is born
- He moves with the camera
- He has multiple sprites to make an animation
- He can jump
The next step is to make the game more challenging by adding obstacles.
